Builder
LLMStack provides an easy to use interface to build, test and manage your apps. It is your central hub to edit your app, publish it, manage versions and control the integrations. You can access the builder by clicking on the app name from your app list in the home page. You will automatically be taken to the builder page as part of app creation flow. The builder has the following tabs:
Template
If an app is built using a template, the template used will be shown here. You can modify your app by customizing the values provided in the template here. Templates are a great way to get started with building apps. They provide a starting point that you can customize to your needs. You can also build apps from scratch without using a template. In that case, you will not see a template tab.
Editor
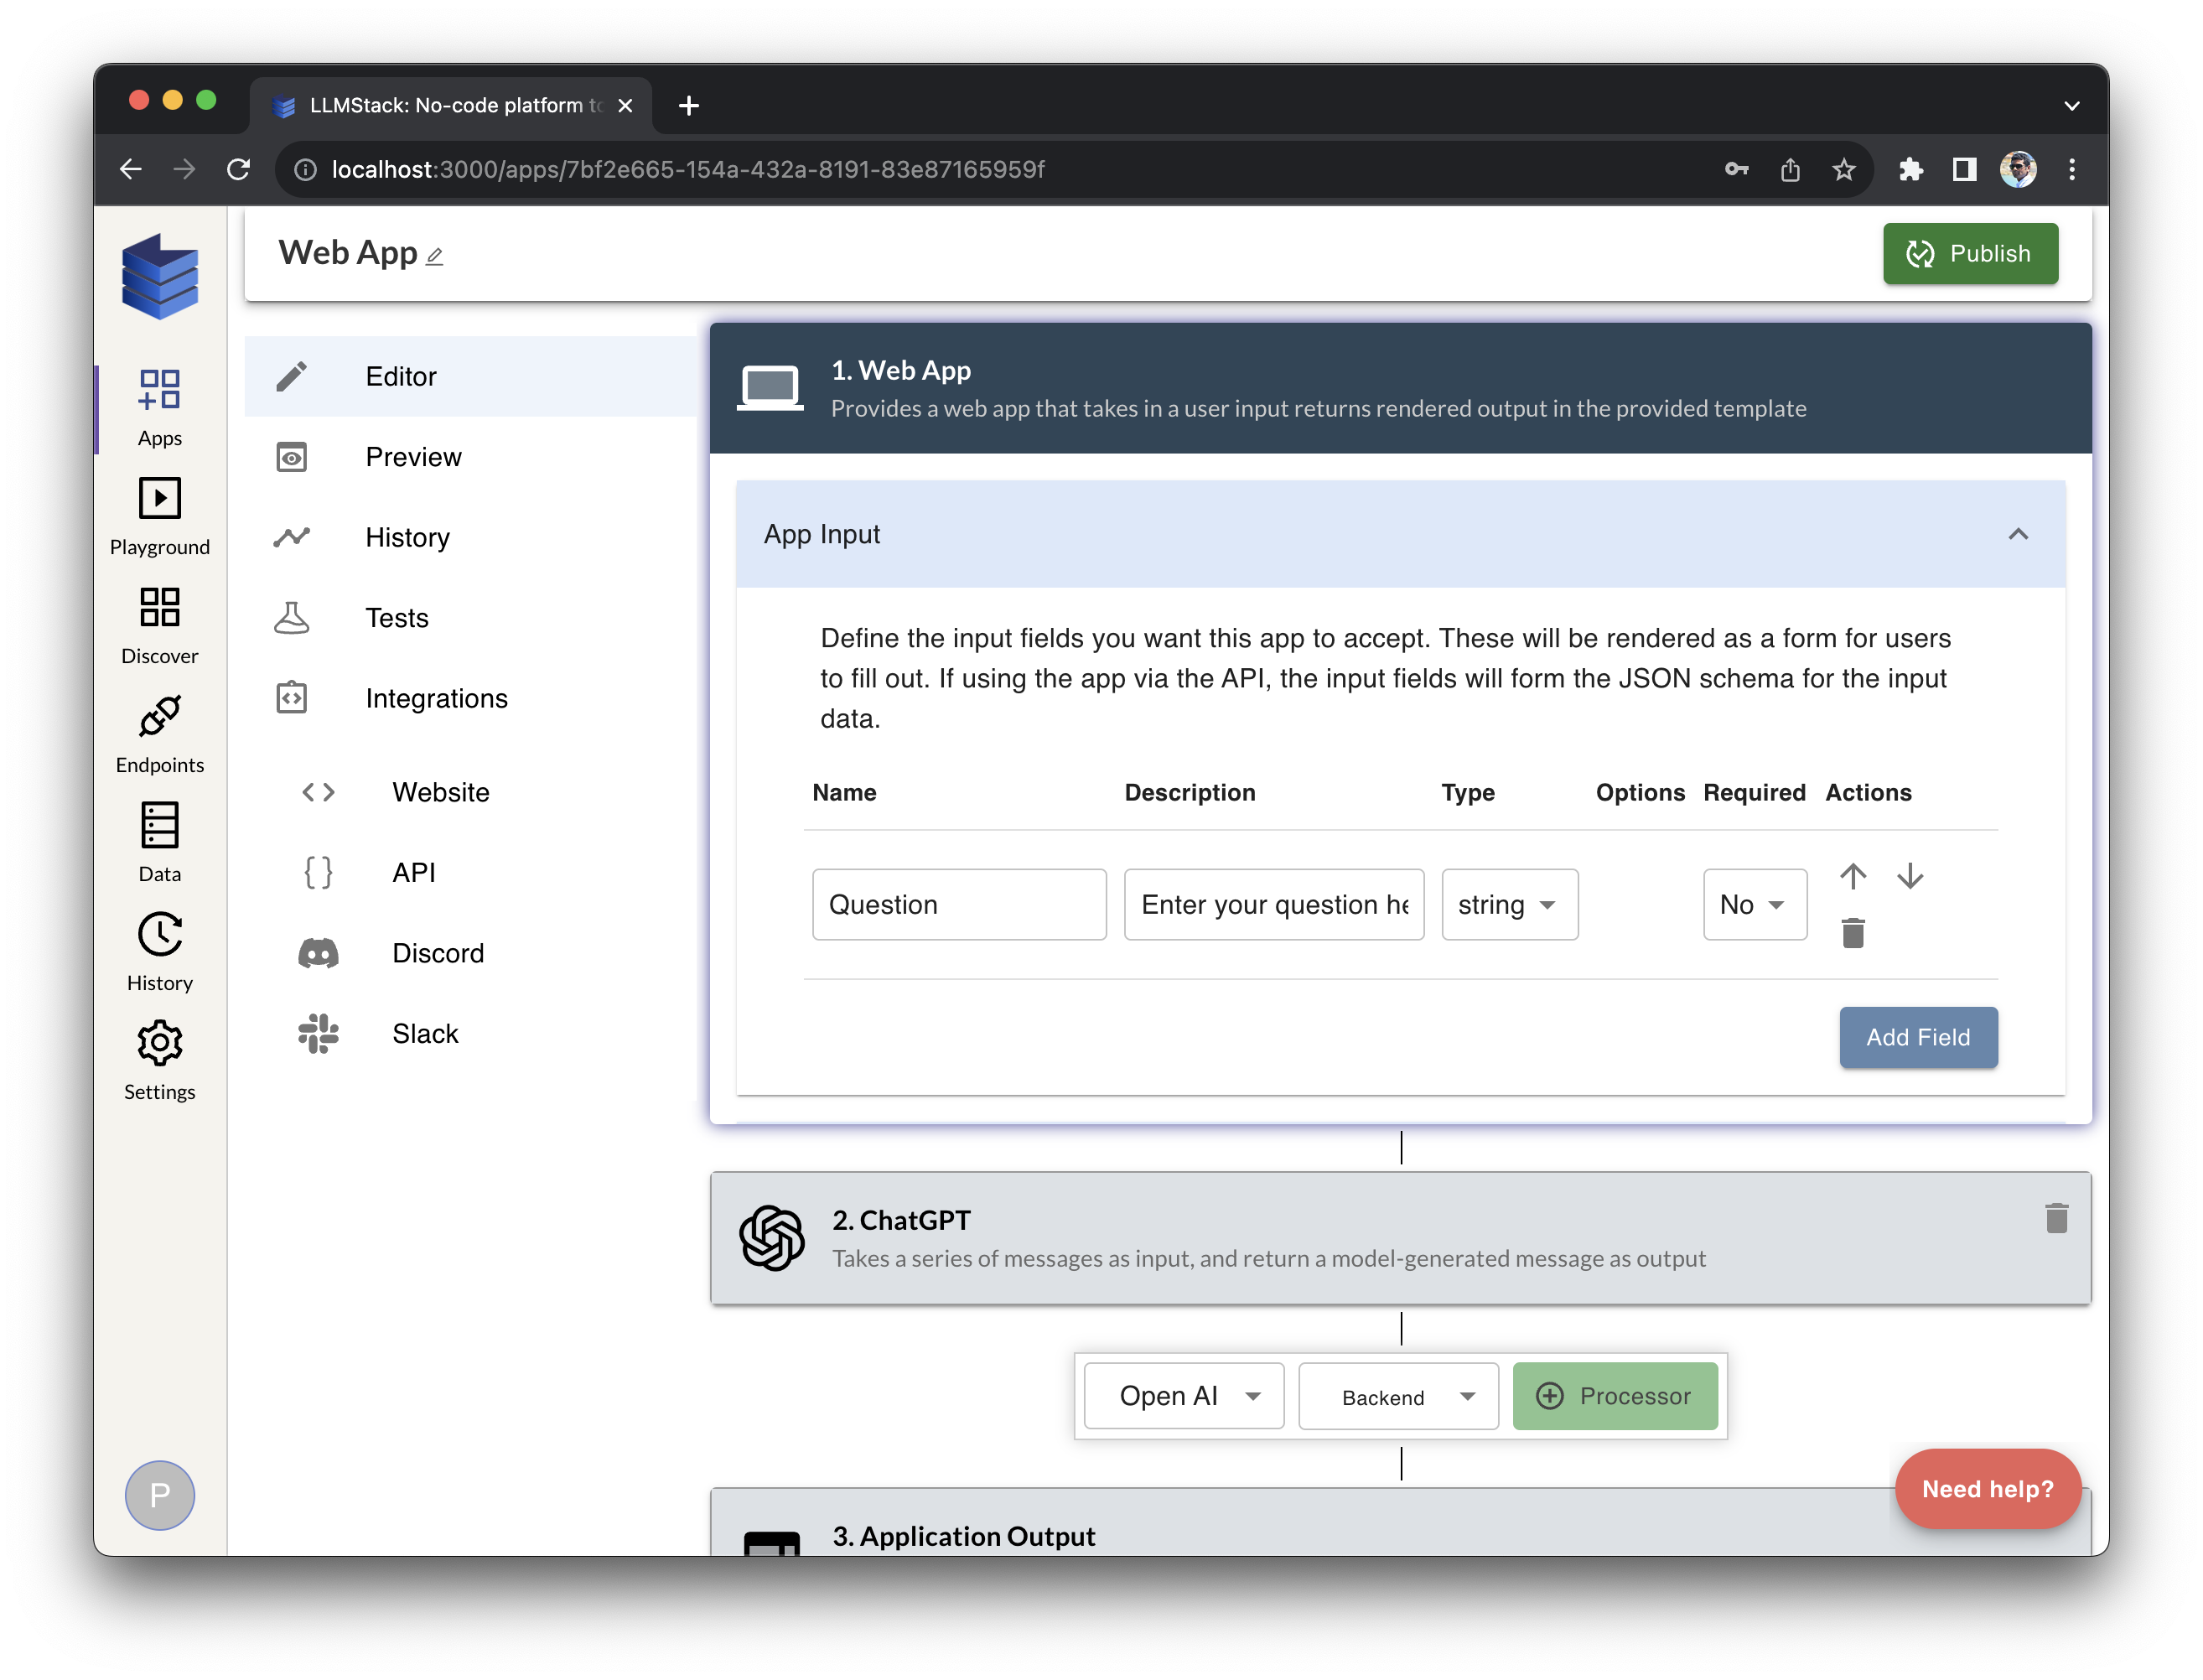
The editor is where you can edit your app. It is a visual editor that allows you to build your app by chaining processors together. You can also add data sources to your app and connect them to your processors if they can use datasources. You can define the input and output of your app in the editor. You can also define the configuration of your app in the editor. The editor is a powerful tool that allows you to build sophisticated apps without writing any code.
Input
You can define the input that the app takes here. Input is defined as a list of fields. Each field has a name, type and a description. Input fields are available as template variables in processors and output of the app. The field types can be one of the following:
string: A string field. This is the default typetext: This allows users to provide a long multi-line text inputnumber: A number fieldboolean: A boolean fieldfile: This field type allows users to provide a file as input. This is useful for apps that need to process files. Data from the file is converted as base64 encoded string and provided as input to the app.select: If the app needs to render a list of options for the user to select from, this type can be used. The options can be defined in theOptionscolumn as a comma separated list oflabel:value.voice: This field type lets users record audio as input for the app. The audio is converted to a base64 encoded string and provided as input to the app.
Processors
Processors are the building blocks and the core of your app. You can chain processors together to build your app. You can add a processor to an app by selecting the provider and processor and then clicking on the +Processor button.
Output
You can define the output of your app here. Output is defined in freeform text. You can use variables from the previous steps to define the output. You can also use markdown to format the output. To insert a variable in the output, click on the variable from the dropdown below the output text area, expand the step and click on the variable to insert in the output.
Preview
Make sure to save the app by clicking on the Save App button at the bottom of the screen before previewing the app.
The preview tab allows you to test your app. You can see how the app renders on web, provide input to your app and see the output. You can also test your app with different input values.
History
History tab shows the history of your app invocations. It shows the input and output of each invocation grouped by sessions as well as chronological timeline.
In sessions view, you can see the pairs of requests and responses in each session along with other session related information. Similarly in timeline view, individual request and responses are shown along with other information.
Tests
Tests tab allows you to write tests for your app. You can create test sets by clicking on the Create Test Set button, provide a name, add input and expected output. You can add more test cases to the test set once it is created. To run the test suite, simply click on the play icon in the actions tab of the test suite. You can also run individual test cases by clicking on the play icon in the actions tab of the test case.
Versions
Versions tab allows you to manage versions of your app. You can create a new version of your app by clicking on the Save App button and providing a change description. You can use Save Draft button and preview changes while you are working on your changes before publishing them to your live app. You can also view the history of your app versions by clicking on the Versions tab in the app menu. You can also view the history of individual versions by clicking on the version number in the versions page.
Integrations
Integrations tab allows you to connect your app to other platforms. You can connect your app to Slack, Discord and more. You can also embed your app in your website using the embed code. You can integrate your app in existing products to provide AI capabilities to your users using the app API.
Publish
You can publish the app by clicking on the Publish button at the top right corner. You can publish the app as a private app that is only accessible to you or the individuals you share the app with, to an org you are part of or as a public app that is accessible to everyone. Once the app is published, you can share the app with others using the app URL. You can also embed the app in your website using the embed code from integrations/web tab or integrate the app in your existing products using the app API.